Showing posts with label vegetables. Show all posts

Saturday, April 16, 2016

Spinach Sauteed with Garlic, Dried Figs, and Honey


Here's a delicious side dish recipe for sauteed spinach, straight from Emril Lagasse and the Food Network website. Bam! I didn't do much fiddling with it, other than to add a sprinkling of hot pepper flakes to give it a little heat and a handful of chopped almonds for some crunch.  It is both sweet and savory. Besides being delicious, it's also fast and nutritious.  Makes a nice side dish.  This recipe serves four as a side dish, maybe two if this is the main dinner feature.

Spinach Sauteed with Garlic, Dried Figs, and Honey
2-3 cloves of garlic, thinly sliced
2 tablespoons olive oil
1/4 cup finely sliced dried figs
1/4 cup vegetable broth
1 pound baby spinach (or grown up spinach, chopped)
1/2 teaspoon salt
1/4 teaspoon ground black pepper
pinch of red pepper flakes
2 teaspoons honey
1/4 cup almonds, toasted and chopped

Add the olive oil and garlic to a large saute pan (one that can hold the pound of spinach). Place on medium heat, stirring as the pan starts to heat up and the garlic begins to cook.  Cook for about 2-3 minutes, stirring often and taking care that the garlic doesn't burn.  Add the figs and the broth and continue to cook, stirring, until the broth reduces considerably.  This will soften the figs and create a sweet, thickened broth.  Add the spinach, salt, black pepper, and hot pepper flakes and cook, tossing the spinach to wilt it. You may have to add spinach in batches as it wilts so that there's room in the pan.  Continue cooking until all of the spinach is wilted.  Remove from heat, taste seasonings and add more salt, pepper or hot pepper flakes if desired. Place in a serving bowl and drizzle with honey.  Just before serving, sprinkle the chopped almonds on top. 

Saturday, January 30, 2016

Honey- & Garlic-Roasted Brussels Sprouts with Almonds--and Homage to Grandma D.


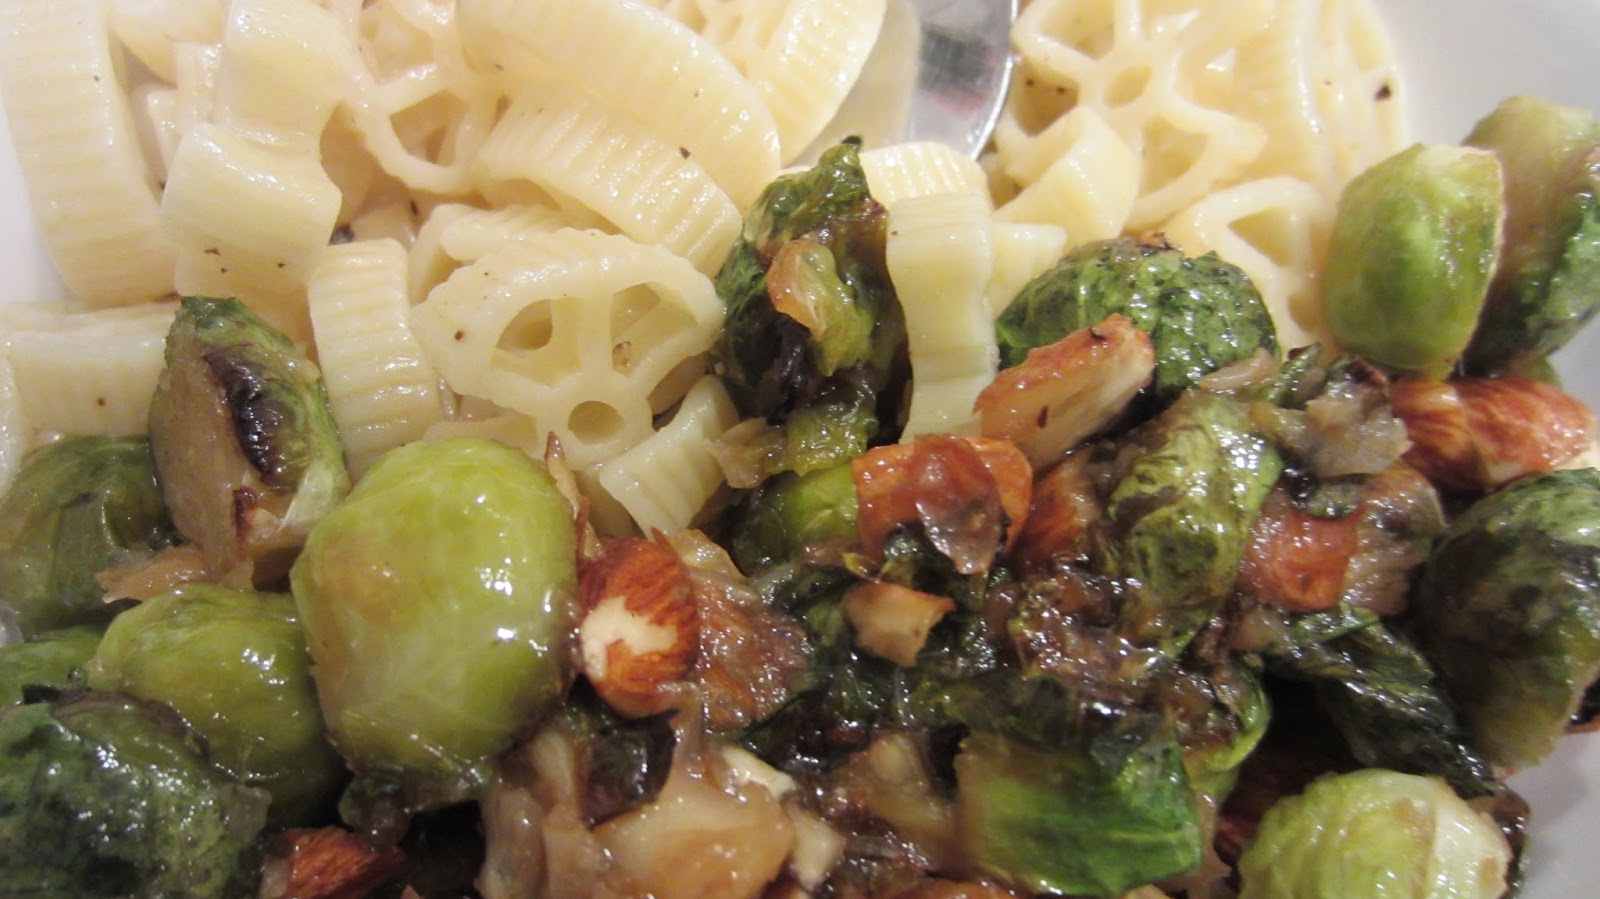
One night, dinner on my own, I roasted these Brussels sprouts and paired them some simple buttered wagon wheel macaroni ("rotelle"), my ultimate (and original) comfort food.  Buttered wagon wheels were the first dish I learned to cook, standing next to my grandmother at her stove. Grandma always had a box of wagon wheels on her shelf when we visited and my pantry is rarely without them now. She'd let me stir the noodles, help me drain them, and then let me stir in the butter to melt, all by myself. On a cold night when I'm on my own for dinner, buttered wagon wheels feel like a hug from her. I usually have some kind of vegetable with them (Grandma valued a colorful plate). These roasted Brussels sprouts are slightly sweet and nutty.  They're colorful and very, very good.  I thought I'd have leftovers, but ate them all--all by myself!

Honey- & Garlic-Roasted Brussels Sprouts with Almonds
1 lb Brussels sprouts, cleaned trimmed and cut in half
4 cloves garlic, unpeeled 
4-5 tablespoons olive oil, divided
pinch of salt
1/2 cup chopped almonds
2 tablespoons honey
2 tablespoons citrus juice (lemon, lime, orange--I used grapefruit)
pinch of hot red pepper flakes (optional)
pinches of salt and pepper
Preheat oven to 400 degrees.  Line a rimmed cookie sheet with aluminum foil.  In a bowl, toss the Brussels sprouts and garlic cloves with 2 (or so) tablespoons of olive oil until they're well coated.  (Don't clean the bowl after this--you'll need it later!) Spread the sprouts and garlic onto the cookie sheet.  Nice if you turn them all cut side down.  Sprinkle with salt.  Roast for about 10 minutes.  Check sprouts and garlic, tossing avoid over-browning and roast for 5-10 minutes more.  The garlic should be very soft and easily squeeze out of the skin.  

While sprouts and garlic are roasting, whisk together honey, citrus juice, and two tablespoons of olive oil.  Add the hot red pepper (if using) and salt & pepper.  Add the roasted garlic to the sauce, mushing with a fork. Place the roasted sprouts back in the bowl, add the almonds and pour the sauce over it, tossing well.  Spread the sprouts and almonds back on to the cookie sheet and roast for another 5-10 minutes.  Check seasoning and serve. This dish makes enough for 2 generous servings
Wagon Wheels-n-Butter 
Bring a pot of water to boil over high heat.  Add a goodly amount of salt and the wagon wheels--about 1/2 cup per person.  Stir and return to a boil.  Boil briskly until the noodles are done to your liking--usually 6-9 minutes.  Drain, return to the pan, and immediately add a pat (about a tablespoon) of butter and stir to melt.  Sprinkle with salt and pepper, if you like.  I like pepper now--would have pitched a "Jennie fit" if Grandma had put it on my wheels when I was little! :) 

Saturday, January 2, 2016

Banana & Ginger Honey Cake and (BONUS recipe!) Homemade Vegetable Broth

A 2015 NPR story about food waste notes that Americans throw away about 1/3 of our available food. So this year, I've resolved to try to waste less food.  Maybe banana cake and bread is a bit cliche in that regard, but instead of tossing out the bananas that get too ripe before I can eat them, I am peeling them, putting them in a baggie and freezing for the future.  Here's a nice banana honey cake from the National Honey Board that I adapted and served for a dinner with some good friends a few nights ago.  It's a sturdy, pound cake-like cake, that's even better if it sits for a day.  

We're also saving almost all of our vegetable scraps in a bag in the freezer and making vegetable broth with them.  Scroll down for the bonus recipe!

Banana & Ginger Honey Cake
2-1/2 cups all-purpose flour
1 teaspoon baking powder
1 teaspoon baking soda
1 teaspoon ground ginger
1/2 teaspoon salt
3/4 cup unsalted butter, room temperature
1-1/4 cups honey
3 Tablespoons sour cream
1 Tablespoon grated lemon zest
2 teaspoons vanilla extract
3 eggs
2 very ripe bananas, mashed (thawed if frozen)
1/4 cup chopped crystallized ginger (optional, but nice!)
1/4 cup chopped walnuts

Preheat the oven to 350 degrees.  Butter and flour a Bundt pan. Sift or whisk the flour, baking powder, baking soda, salt and ginger together and set aside.  In the bowl of an electric mixer, beat the butter and honey together until light and fluffy, about three minutes.  Add the sour cream, lemon zest and vanilla extract and mix to combine well.  Add the eggs, one at a time, mixing to combine well after each one.  Add the flour and mix just until it's well combined (don't over mix).  Fold in the crystallized ginger and nuts.  Pour into the prepared pan and bake in the center of the oven until a toothpick inserted in the center comes out clean, about 40-45 minutes.  Cool for about 15 minutes and then turn out on to a plate.  When fully cooled, tightly wrap with foil or plastic wrap. Enjoy!

Bonus Recipe:  Homemade Vegetable Broth from Food Scraps
As you peel and prepare vegetables for other meals, save the scraps that you don't use in a freezer bag, adding to the bag every time you have some scraps.  Onion peels, carrot scrapings, ends of celery, mushroom stems, sweet red or green pepper seeds, leek tops, garlic peels and ends, parsley and other herb stems--all work well. Hot pepper seeds will make a very spicy-hot broth, so use them sparingly.  Also, skip strongly-flavored cruciferous vegetables like cabbage leaves, broccoli stalks and Brussels sprouts, which tend to overwhelm the broth. 

When the bag is full, place the contents in a large stock pot and, over low heat, slowly braise them so that they begin to release their juices. Check and stir the pot regularly to be sure the veggie scraps don't burn.  Once the scraps are fully thawed and have released their juices, pour in enough water to cover, add a handful of peppercorns and a good measure of salt. You can add other flavorings, too, like bay leaves or thyme, if you'd like. Bring to a boil and then lower the heat to very slowly simmer the broth for about an hour or two, stirring occasionally. Strain the broth and taste, adding more salt or other herbs if desired.  If you want a very clear broth, then don't press too hard on the scraps when straining.  Compost the scraps.  You can place the broth in containers and freeze for future use or turn the broth into a nice soup that day.  


Friday, August 16, 2013

Fresh Tomatoes! Two Recipes!

Tomato Sandwich with Sourdough Cornmeal Bread
The tomatoes in our garden took their time ripening this year, but we now have baskets full to enjoy before the late blight knocks them out for good. (A friend and colleague recommends using a copper sulfate to prevent blight, which we'll try next year!)  My favorite way to eat fresh tomatoes is as a simple tomato sandwich.  Brings back memories of watching my Grandmother Wood prepare tomato sandwiches:   thin slices of  Pepperidge Farm white sandwich bread slathered with mayonnaise, topped with thickly sliced tomatoes and an ungodly amount of salt.  I'm almost positive Grandma peeled the tomatoes since she peeled everything (even celery).  Made a mean BLT, too!

The first recipe here is for Sourdough Cornmeal Bread, which isn't as delicate as Pepperidge Farm white bread, but makes a great sandwich bread with a nice, nutty crunch.  Thinly sliced, it's perfect for tomato sandwiches.  Our dear friends (and recent visitors) Rebecca, Tom and the amazing going-on-3 Eleanor enjoyed some of this bread toasted with honey during their visit.  This recipe's for you, Rebecca! :)

The other recipe for fresh tomato slices is adapted from a recipe in the Pittsburgh Post-Gazette: Brenda Waters's Grandmother's Special Sliced Tomatoes. (Grandmas really seem to know their way around tomatoes!)  I hesitate to add anything at all to a nice, fresh tomato slice, but this recipe was too intriguing to pass up--and it's delicious.  A friend who doesn't even like honey (yes we actually have friends who don't like honey!) liked these tomatoes.  Read on for the recipes!

Sourdough Cornmeal Bread for tomato sandwiches
Sourdough Cornmeal Bread
This recipe is adapted from Sunset's A Cookbook of Breads (1974), which I must have picked up at a thrift store ages ago. It requires sourdough starter, which isn't hard to make--just takes about a 3 to 5 day commitment.  Need a sourdough starter recipe? Here are step-by-step instructions from King Arthur flour. Also check out this quick starter recipe from a previous blog post for sourdough English muffins.

1 teaspoon (1/2 package) quick rise yeast
1/2 cup sourdough starter
2 tablespoons canola oil
2 tablespoons honey
1 teaspoon salt
1 cup very warm water
1 cup cornmeal (plus extra for sprinkling on dough before baking)
1 cup whole wheat flour
1-2 cups bread flour (you could use all-purpose flour if you want--and could also skip the whole wheat flour.  You'll get a slightly less dense loaf if you do).

Combine the yeast, starter, canola oil, honey, salt, water, cornmeal and whole wheat in a mixing bowl.  Using a wooden spoon (or the dough hook of a mixer), combine well.  Add the white flour, about a 1/2 cup at a time until a stiff dough forms. Knead the dough until it's smooth--by hand (on a floured board) for about 10 minutes or by mixer for about 5.  (Using a mixer will likely cut down on the amount of flour you use overall, making the dough a bit lighter.)

Lightly coat a large bowl with oil and place dough in the bowl, oil top and cover with plastic wrap and then a kitchen towel (not terry cloth).  Let rise for about 1 1/2 hours in a warm spot until it doubles in bulk.  Remove from the bowl, folding the dough in on itself a few times and form into a round ball (or boule).  Place a sheet of parchment paper on a flat-sided cookie sheet and sprinkle it with a little corn meal. Place the dough on the sheet and sprinkle a little cornmeal on top.  Cover with the plastic wrap and kitchen towel and let rise for another 1 1/2 hours.

Preheat the oven to 375 degrees.  If you have a baking stone, put it in the oven on a middle rack to preheat as well.  When the oven is preheated and the dough has risen, take a serrated knife and make a few slashes in the top (each about 1/4-1/2 inch deep).  Slide the dough (with parchment) from the cookie sheet onto the baking stone (if you're using a stone) or just put the cookie sheet with dough into the oven.  Bake for about 30 to 35 minutes.  The crust should be nicely browned--almost honey colored.  The crust will be crunchy when first baked, but will soften once it cools. (You can crisp the crust by reheating in the oven if you'd like). You should probably wait until it cools completely to slice it, but I've never been able to wait that long!

Sliced tomatoes with vinegar honey dressing

Sliced Tomatoes with Vinegar and Honey
4 large fresh tomatoes, peeled
2 tablespoon cider vinegar
3 tablespoons honey
kosher salt
Core and slice the tomatoes in 1/2 inch slices.  Place on a plate or platter with a lip (so that the dressing doesn't run off!). Stir the vinegar and honey together in a small microwaveable bowl. Heat for 15 seconds, just to warm the mixture and ensure that it's well combined.  Sprinkle the tomatoes with salt and drizzle the vinegar-honey mixture on top.  Serve with the bread to soak up all of those delicious juices!
Serves 4


Monday, November 19, 2012

Honey Pickled Carrots


Both of my grandmothers were big proponents of relish trays on holiday tables.  When I was little, I would make a meal out of the sweet gherkin pickles and black olives that my Grandma Davis always had out.  I continue the tradition at our holiday table and this year I'm adding these lovely carrot pickles.  They are adapted from a recipe in the November 14, 2012 New York Times by David Tanis with a few changes.  I swapped the sugar in the recipe for honey, of course. Since honey is sweeter than sugar, I substituted 1/3 cup honey for the 1/2 cup of sugar.  And instead of making carrot slices, I just used a bag of baby carrots.  I also skipped the 6 dried red peppers Tanis's recipe calls for since my family isn't big on spicy foods.  These pickles are great without the heat, though next time I make them, I think I'll include that touch of zing.  My amazing great nephews, Samson (3) and Bohdan (not-yet-1) will be joining us for Thanksgiving this year and I'm hoping that they, too, will come to carry on the holiday relish plate tradition!

Honey Pickled Carrots
1/2 cup white wine vinegar
1/3 cup honey
1 tablespoon kosher salt
4 cloves
1 bay leaf
1/2 teaspoon caraway seed
1/2 teaspoon coriander seed
3 large garlic cloves, each cut in half
1 pound "baby" carrots

In a non-reactive (stainless steel) pot, combine the vinegar, honey, salt, cloves, bay leaf, caraway, coriander and garlic cloves.  Add 2 cups of water and bring to a boil.  Reduce heat to a steady simmer and add the carrots.  Cook for about 5 to 7 minutes--you want the carrots to still be firm and slightly crunchy, but not raw.  Remove the carrots and spread out on a cookie sheet to cool.  Let the brine come to room temperature.  Put the carrots in a glass container and pour the brine over them.  There may be a bit left over. If so, be sure to scoop out any spices that might be at the bottom and add them to the jar.  Let the carrots marinate for at least 8 hours, refrigerated.  They can be made well in advance--up to four days.

Stay tuned for another make-ahead Thanksgiving dish:  delightful butternut squash rolls!

Friday, September 14, 2012

Roasted Beets with Honey & Lemon

I'm a confirmed beet lover and could eat them at every meal.  I know, though, that beets are not America's favorite veggie. An Eating Well blog includes them among the top five "most hated vegetables" in the U.S.   (What's America's most favorite vegetable?  Apparently, according to a report in Bloomburg News, it's potatoes!) 

Roasting beets is one way to persuade a confirmed beet hater to give them another try. Roasting caramelizes the sugars in the beets and makes very sweet yet they still retain their savory earthiness. I'm not promising that the beet haters in your life will convert after you serve these--but I am suggesting it's a worth a try!

Roasted Beets with Honey & Lemon
Preheat oven to 400 degrees.

Figure on about 1 large, 2 medium or 3 small beets per person.  I usually roast extra since the oven's on and I'm happy to eat roasted beets throughout the week.  It's best if you roast similarly-sized beets in the same pan (that is, not mixing large and small beets together).  Truth be told, though, I usually throw 'em all in together when I'm short on time.

Wash the beets well and cut off their tops, leaving about 1 inch of the stalks. (This ensures the beets won't bleed too much during roasting.)  Select a roasting or baking dish that is large enough to hold all of your beets in one layer. Line it with a piece of aluminum foil that is large enough to cover the bottom of the pan AND fold over to fully envelop the beets.  Drizzle about 1-2 tablespoons of olive oil on the foil.  Place the beets in the pan, tossing them in the oil and drizzling more oil on them to be sure every beet is covered with olive oil.  Sprinkle kosher salt on the beets--at least a pinch for each beet.  Fold the foil over the beets, being sure to securely crimp the edges together to keep the heat inside.  The beets will roast and steam in this packet.  Place in the pre-heated oven for at least 40 and up to 60 or 65 minutes (depending on how big your beets are).  Remove from the oven and let them sit on the counter until cool enough to handle--about 20 minutes.  This extra time will enable them to cook a bit longer, too.

Remove the beets from their foil packet and slip off their skins.  Cut them into 1/2-inch pieces and place in a bowl.  I had about 2 cups of beets when all was said and done.  Drizzle 2-3 tablespoons of fresh lemon juice (go ahead and used bottled if that's what you have) and 2 to 3 tablespoons honey over the beets, tossing to mix thoroughly.  Taste and add salt and pepper as needed.  You can serve them as is at room temperature, or cover and refrigerate them to serve cold later.  You can also add some fresh lemon zest to zing up the lemon flavor a bit and/or some chopped parsley to add color.  If so, add the parsley just before serving.

Monday, September 10, 2012

Cherry Tomatoes in Honey Brine


As I lamented in a previous post, we lost all of our tomato plants to the destructive late blight.  I was particularly sad to say good-bye to two vibrant yellow cherry tomato plants.  We'd been enjoying these sweet-like-candy tomatoes throughout August.  This recipe for brined cherry tomatoes gave me a chance to use some of the not-quite-ripe tomatoes still left on the vines.  In fact, this recipe requires not-quite-ripe tomatoes.  Ripe tomatoes will get too mushy in the brine, but those that haven't ripened fully keep a nice crunch.  This is, admittedly, a recipe for adventuresome cooks (and eaters). It's very simple to do, but requires patience (time for the tomatoes to soak in the brine) and the result is crispy, salty, piquant pickled tomatoes--a few go a long way.  They'd be great as part of an antipasto platter, or served with cheese and crackers, or gracing the side of grilled cheese sandwich or added to a leaf lettuce salad.  Use them where ever you'd use a dill pickle.

Cherry Tomatoes in Honey Brine
1 1/4 pounds half-ripe cherry tomatoes
6 dill heads (or 2 tablespoons dill seeds and about 6 sprigs of fresh dill)
1/4 cup fresh horseradish, grated (you can used bottled horseradish instead--just be sure it's not a horseradish sauce with cream)
3 sprigs of fresh parsley
1/2 fresh hot pepper, seeded (I used a Hungarian hot) and cut in a few pieces
2 tablespoons pickling salt (or UNiodized salt)
2-3 tablespoons honey
1 quart of water

In a jar that will hold two quarts, layer the tomatoes interspersed with the herbs, horseradish and pepper pieces.  Dissolve the salt and honey in the water and pour over the tomatoes in the jar.  Be sure the tomatoes are submerged in the brine--I filled a small zipper-lock bag with some water and placed it on top of the tomatoes to keep them under the brine.  If your jar has a large opening, you could put a plate or saucer on top.  Let the tomatoes ferment in the brine, unrefrigerated, for a week.  When a week is up, cover them tightly and place in the refrigerator to develop more fully.  You can taste them throughout the process--and you might enjoy the delicate flavor they begin to develop after about a day.  They should keep in the fridge for at least a month.


Saturday, September 8, 2012

Sweetness and Blight: Honey Roasted Tomatoes

Slightly ripe plum tomatoes, ready for roasting
We were dismayed to head to the garden last week to find that our tomatoes were hit with the dreaded (and highly contagious) late blight, which destroyed the plants in a day. This is the pathogen that was responsible for the Irish potato famine--it affects both tomatoes and potatoes.  The spores of the pathogen, Phytopthora infestans, readily spread by wind and rain, so the plants must be destroyed immediately to be sure they don't spread the infection to a neighbor's crop. There is nothing to do but pull up the plants, burn them and cry.  Well, actually, there is one more thing to do:  roast the tomatoes that you can save.

We harvested the (mostly green) tomatoes that weren't yet infected and carted them inside to ripen as best they could.  These would not be the season's most delectable tomatoes, that's for sure.  After a week in a basket under some newspapers, the tomatoes turned rosy. To pump up their sweetness and flavor, I roasted them with honey, garlic and thyme--a simple but delicious way to deal with less-than-perfectly ripened tomatoes, and a nice alternative for processing tomatoes if you have a bumper crop.  You can honey roast any kind of tomato--plum, globe, cherry--and they make a great lunch meal with some crusty bread, a unique side dish, or can be pureed into a nice tomato sauce for pasta. The process is simple, and the results are good enough that these tasty tomatoes can even provide some solace for the heart break of late blight.

HONEY-ROASTED TOMATOES

Preheat the oven to 400 degrees.

Plum tomatoes after the roast
Slice tomatoes in half (larger tomatoes can be quartered if you like) and remove the seeds. Line a cookie sheet with a lip or a roasting pan with aluminum foil and lightly grease with olive oil.   Place tomatoes in the pan, skin-side down.  It's fine to crowd the pan, but there should be only one layer of tomatoes.  Tuck unpeeled cloves of garlic in and among the tomatoes (optional but very nice, especially if you plan to make pasta sauce with this)--we like garlic, so I usually use a whole head.  Tuck sprigs of fresh thyme in and among the tomatoes and garlic. Sprinkle the tomatoes generously with olive oil and then slightly less generously with honey.  Make sure every tomato has splashes of oil and drizzles of honey.  Sprinkle about 1 or 1 1/2 teaspoons of kosher salt all over.  Roast for anywhere from 30 to 60 minutes depending on what kind of tomatoes you're roasting (cherry tomatoes will take much less time) and how caramelized you'd like them to be.  I roasted a bunch of plum tomatoes and Paul Robeson heirlooms (see photos below) for 60 minutes.  You can serve the tomatoes as is, taking care to peel the roasted garlic first, and offering lots of crusty bread on the side to sop up the juices.  Or, you can let them cool, remove the skins and whirl them and the (peeled) garlic in a blender or food processor for roasted pasta sauce.  You can also freeze the tomatoes once they cool or freeze the tomato sauce.

A NOTE ABOUT AMOUNTS:  You can roast as many or as few tomatoes as you have.  If you're roasting globe tomatoes, figure on about 1/2 per person if you're serving them as a side dish.  You might need 2 or 3 paste tomatoes (which make the best roasted tomato sauce, too) per person.  Cherry tomatoes--well, maybe 10 per person?  How hungry are you and your peeps? :)


Paul Robeson heirloom tomatoes ready for roasting


Paul Robeson heirlooms after the roast-a bit juicier than the plums!

Thursday, July 12, 2012

Got Summer Squash? Make Pasta Salad!

The zucchini and summer squash are coming in fast and furious in the garden, despite the fact that the wretched squash vine borer has had its way with a few of our plants. Grrrr.  This is a delightful pasta salad that you can serve immediately or put in the fridge and eat later.  The origins of the recipe come from the July 2009 issue of Martha Stewart Living, but my adaptation is below.  It's a nice change from a traditional pasta salad dressed with a vinaigrette.

Summer Squash Pasta Salad with Honey
Serves 4

1/2 pound gemelli (or other short, tubular pasta)
about 1/4 cup extra-virgin olive oil (plus more for drizzling)
1/4 cup raw almonds
2 cloves garlic, minced
1/2 pound summer squashes (about two smallish yellow squash and zucchini), cut into 1/2 inch circles
3 tablespoons honey
1 1/2 tablespoons cooking sherry
1 Hungarian hot pepper, ribs and seeds removed and minced
3 tablespoons chopped fresh basil
2 tablespoons minced fresh thyme
salt and pepper to taste

Cook the pasta in a large pot of salted boiling water until al dente.  Drain, place in a bowl and stir in two tablespoons of olive oil.  While pasta is cooking, toast the almonds in a dry skillet over medium-high heat, shaking or stirring occasionally until fragrant--about 3 minutes.  Remove from skillet, roughly chop and set aside.  Add two tablespoons of olive oil to the skillet and, over medium-high heat, saute the garlic for a few minutes.  Add the squash, with a sprinkling of salt and saute, turning occasionally, until squash is thoroughly cooked.  Add the toasted almonds and the squash to the pasta and toss.

Return the skillet to medium heat and add the honey, bringing to a simmer while stirring.  Add the sherry and Hungarian hot pepper and cook until the mixture reduces a bit but is still runny--about 1 minute.  Pour over the pasta mixture and toss.  Add the minced basil and thyme and taste, adding salt and pepper as needed. Drizzle with a little olive oil.  You can serve this right away or refrigerate and serve later.  Bring it to room temperature before serving.

Monday, June 25, 2012

Beet & Beet-Greens Salad

We have an amazing crop of beets this year, one of my favorite vegetables from the garden.  An old friend is coming to visit today and I wanted to make something special with the beets for lunch.  I'm ashamed to say that I often compost the beet greens, favoring the sweet beet root--I could eat them every day.  A recipe by David Tanis in last Wednesday's New York Times inspired me to use the beet greens in this dish.  I hew pretty close to the recipe--with the addition of honey, of course!  This dish will use up a few bowls and took me about 40 minutes to make.  It was worth it, though!


Beet & Beet-Green Salad

makes about 4 to 6 servings

2 pounds medium beets in skin, well washed 
12 to 16 ounces beet greens (or chard or other greens)
2-4 tablespoons olive oil (doesn't have to be extra virgin)
kosher salt
1 teaspoon coriander seeds
1 teaspoon cumin seeds
(If you don't have coriander and cumin seeds in your spice cupboard, then used ground cumin and, if you'd like, some cilantro--the flavor will be a bit different.)

FOR THE VINAIGRETTE
1/3 cup red onion or shallot, finely diced
2 garlic cloves, finely grated
3 tablespoons red wine vinegar
2 tablespoons honey
Salt and pepper
1 teaspoon toasted cumin-coriander mixture
Pinch cayenne
4 tablespoons extra virgin olive oil

FOR THE YOGURT SAUCE
1 cup full-fat plain yogurt
1 garlic clove, finely grated
2 tablespoons honey
Salt and pepper to taste
Pinch cayenne
1 teaspoon toasted cumin-coriander mixture
2 tablespoons fresh mint, finely chopped
1 tablespoon extra virgin olive oil
3 tablespoons freshly snipped dill for garnish

PREPARATION
Preheat oven to 400 degrees and bring a large pot of salted water to boil.  Trim the tops off the beets and scrub them well.  Line a baking dish (or cookie sheet with sides) with a large enough piece of tinfoil that will be able to enclose the beets completely.  Pour about 1-2 tablespoons of olive oil on the foil, add the beets so that they are in one layer.  Sprinkle 1-2 more tablespoons of olive oil on top and toss the beets so they are thoroughly coated in oil.  Sprinkle about 1 teaspoon kosher salt on top.  Completely enclose the beets in the aluminium foil and roast in the oven about 45 minutes to an hour (depending on how big those beets are).  Remove from oven and let them sit to steam and then cool a bit while you work on the rest of the dish.  them in a baking dish in one layer (if some beets are larger, halve them so they will cook evenly). When the beets are cool, open up the foil and slip off the skins--the skins should slip off easily if the beets are fully cooked. Cut into wedges.

Chop the beet greens into ribbons and then wash very well.  Add the greens to the pot of boiling salted water and cook until just wilted, about 2 minutes. Drain, cool under running water, then squeeze out excess water.

In a dry pan over medium heat, toast the coriander and cumin seeds until fragrant and just lightly browned, about 2 minutes. Grind to a coarse powder. 

Put the onion, garlic and vinegar in a small bowl and leave for 5 minutes or so, then whisk in the remaining ingredients.

Put the yogurt in small bowl. Add the garlic, honey, salt and pepper, cayenne, cumin-coriander mixture, mint and olive oil.

Season the beet wedges lightly with salt and dress with half the vinaigrette. In a separate bowl, lightly salt the greens and dress with remaining vinaigrette. Arrange dressed beets and greens on a platter and top with a little smear of the yogurt sauce. Sprinkle with dill, and pass the rest of the yogurt sauce at the table. 


Tuesday, June 5, 2012

Polenta Stuffed Chard with Quick Honey Tomato Sauce

The inspirations for this bubbly dish of goodness came from a few sources.  The first is a recipe for polenta stuffed chard by Gretchen McKay published in the Pittsburgh Post-Gazette.  The second is a quick pasta sauce recipe in the Best Recipes Cookbook by America's Test Kitchens.  And finally, our recent honey extraction, the big leaves of Swiss chard growing in the garden, and the bumper crop of garlic scapes inspired me to fiddle with both of these recipes.  Though the dish requires a few steps and a little advanced planning (the polenta needs some time to set up), it's not that complicated--and it's delicious!

Truth be told:  you could make this dish with any nice tomato sauce recipe you have--you don't need to have a drop of honey in the house (or garlic scapes for that matter; just substitute some minced garlic cloves).  But this is a blog about cooking with honey, so there's honey in this dish!

For the polenta:
3 cups chicken broth (or vegetable broth, or even water if you'd prefer--though you may need a bit more salt)
1 cup of polenta (or coarsely ground corn meal)
2 tablespoons butter
1/4 cup finely grated Parmesan cheese
pinch of salt

Lightly oil a 4x10 glass dish (or 8x8).  Bring the broth (or water) to a rolling boil in a sauce pan.  Slowly whisk in the polenta, stirring constantly. Lower the heat so that the polenta barely plops an occasional bubble. Cook for about 20 minutes, stirring frequently to be sure the polenta does not stick to the bottom of the pan.  When the polenta is very thick, remove from the heat, stir in the butter and the Parmesan, blending well.  Pour the polenta into the prepared glass dish and cool for at least 15 minutes.  Place in the refrigerator to set up for about 30 minutes.  If you're making the polenta well in advance, cover it. It can sit overnight.  When ready to make the rolls, cut the polenta into 12 pieces, about 2x3 inches.

While the polenta is setting up, make the tomato sauce:


For the honey tomato sauce:
3 tablespoons olive oil
4-6 garlic scapes (about 4 inches long), chopped
1 28-ounce can of whole tomatoes, chopped
1/8 cup honey
1 tablespoon vodka
4-6 good sized basil leaves, minced
pinch of red pepper flakes (optional)
salt to taste.

Heat a frying pan over medium high heat and add the olive oil, letting it heat for about 30 seconds or so.  Add the minced garlic scapes with a pinch of salt and saute for about 1-2 minutes, being careful not to let the scapes brown.


Add the tomatoes, stirring to distribute and bring them to a gentle simmer.  Cook for about 10 minutes so that they become thick and reduce a bit.


Stir in the honey, vodka and basil and cook for a few minutes more then remove from heat.  Taste and check seasoning, adding some salt and pepper (and if you'd like, red pepper flakes).

Prepare the Swiss Chard: 
You'll need 12 large Swiss chard leaves. Wash the leaves and cut the thickest part of the stem out, trying to keep them intact if you can. Put the leaves in a bowl and pour boiling water over to wilt them.  Let them sit in the water for about 6 minutes and then drain in a colander.

For the rolls:
12 wilted Swiss chard leaves (see above)
12 pieces of polenta, about 2x3 inches long
6 1/2 inch slices of mozzarella cheese, cut in half
1/2 cup finely grated Parmesan cheese
Quick Honey Tomato Sauce

Preheat the oven to 350 degrees and cover the bottom of an 9x13 glass baking dish with some of the Quick Honey Tomato Sauce. (I used two 8x8 glass dishes.)

Place a kitchen towel (not terry cloth) on the counter and put one wilted Swiss chard leaf on the towel, blotting it a bit to sop up any water that's clinging.  Place one piece of polenta on the edge of the leaves and top with one piece of mozzarella.  Top with about a tablespoon or so of sauce.  


Fold the leaf over the polenta and cheese like you're making a burrito: fold the side closest to you up first then fold over the two edges.  Roll until the leaf fully covers the polenta, cheese and sauce.


Place the roll in the prepared pan and continue making the rest of the rolls until you fill the pan.  Top the rolls with the remaining tomato sauce then top it all with Parmesan cheese.


Bake at 350 for about 30 minutes until the dish is hot and bubbly. Let sit for about 10 minutes to cool then serve.  This recipe makes 12 rolls, or enough for 6 people (without seconds!). 


Saturday, May 26, 2012

Pickled Garlic Scapes


What a surprise to see the garlic scapes already winding and twisting their way out of the garlic plants yesterday.  They're at least a week if not more ahead, like many plants this year. I think of June as scape month.   Scapes are the garlic plant's flower heads. If they aren't snapped off when they emerge, then the plant will put lots of energy into the scape rather than into the garlic head beneath the ground.

Many folks just snap them off and compost them but they're edible (although Robert has his doubts).  They're not a strong as the garlic clove, but they do have a distinct garlic flavor and can be used anyway you'd use garlic:  saute them and put them in a pasta sauce, chop them and put them in a vinaigrette, add them to soups.  Search for "garlic scape recipes" on-line and you'll find lots of ideas. You can even grill them and eat them like a vegetable.  They're a delicacy!

Since my proclamations have not convinced Robert of their appeal, I decided to experiment by making garlic scape pickles. I figure if they're not good, I haven't lost much.   I hasten to add that this is a tried but not yet TASTED recipe, so I can't vouch for the flavor (or even the texture) of the scape pickles.  I just made them today and they need two weeks to develop.   I don't expect them to be very sweet pickles--in fact, I'm hoping they're more like dilly beans than anything.   I'll report back with tasting reviews once we give them a try.

TASTING UPDATE!  During the spring honey extraction, we tasted the scape pickles, with rave reviews.  They aren't too sweet (or salty)--very much like dilly beans.  Next time, I think I might trim off the fine, dark tips of the scapes, which tend to be a bit chewy when pickled.  This recipe, though, is a keeper!

Here's the recipe:


PICKLED GARLIC SCAPES WITH HONEY

pack the scapes into the jar
Makes 4 pints (or about 8 1/2 pints)

A big bowl of garlic scapes (about 1 1/2 pounds)
4 cups cider vinegar
2 cups water
4 tablespoons kosher salt
2 tablespoons honey
2 teaspoons dill seed*
1 1/2  teaspoons black peppercorns*
1 1/2  teaspoons yellow mustard seeds*

*You can use other seasonings--red pepper flakes, fresh basil, oregano, thyme--sky's the limit!

Preheat oven to 250 degrees.  Wash mason jars in hot soapy water and place on a cookie sheet.  Put jars in the oven for 30 minutes to sanitize.   Fill a canner with water about 2/3rds of the way full and bring to a boil. This will take about 20-30 minutes, too.

In a large, non-reactive (not aluminum) sauce pan, bring the vinegar, water, salt and honey to a boil and keep hot while you prep the jars with the scapes.

Thoroughly wash the scapes.  Boil some water and pour it over the lids to sterilize and also to ensure that the lids make a good contact with the jar.

Usually when canning, I fill the jars all at once and then cap them, but with these I had to do them one at a time as the scapes kept escaping from the jars.  I used eight 1/2 pint jars, but can appreciate why wide-mouth pints might be easier to work with.

When the jars are ready, place about 1/2 teaspoon of the dill seed, 1/4 teaspoon of peppercorns and mustard seeds in each.  Coil the scapes around the outside, pressing down firmly and then filling the center with scapes that have been cut to the length of the jar.  Pack them as tightly as you can.  Pour the hot brine over the packed scapes, filling to about 1/4 inch from the top.  Place the lid on top of the jar and screw on the band being careful not to screw it on too tightly.  Proceed with the rest of the jars.  Place in a boiling water bath for 15 minutes.  Turn off the heat, remove the lid and let sit in the water for another 5 minutes.  Remove the jars to the counter.  Check the seals and store the pickles for two weeks to let the flavors develop.  Store any jars that did not seal in the refrigerator.
Fill with the brine


Jars ready to go in the water bath

boiling water bath for 15 minutes


VOILA!

Monday, April 2, 2012

Broccoli Salad

It's been quite awhile since I've posted to this blog.  The mid-semester demands of teaching have kept me away from the kitchen--and the bees.  Here's a great broccoli salad that makes a wonderful side dish or nice lunch to pack.  It's slightly sweet from the honey and dried fruit and can be adapted with anything you have on hand.  Swap out the dried currants for some black olives and add some crumbled feta cheese, for example.  Hope you enjoy!

BROCCOLI SALAD
1 bunch of broccoli cut into large spears
1/4 cup red onion, diced
1/4 cup dried currants (or raisins, or craisins or other dried fruit)
2-3 tablespoons mayonnaise
1-2 tablespoons honey (I used our summer honey for this)
salt and pepper to taste.

Bring a large pot of water to boil and add about a teaspoon of salt.  Prepare a bowl of ice water.  Put the broccoli spears in the boiling water and blanch until the spears turn bright green.  Drain and immediately plunge into the ice water.  Drain the spears, drying well, and chop into about a 1/2 inch dice and put in a bowl.  Add the remaining ingredients and toss to combine well.  Taste and check seasonings.  Serve cold.  Makes about four servings.

Thursday, May 26, 2011

Memorial Day Picnic Recipes

SPICY VEGETARIAN HONEY-BAKED BEANS!
Dark fall honey makes a great substitute for molasses in baked beans. These beans are quite spicy, so if you want to tone that down a bit, add a little less (or omit altogether) the chipotle pepper.
2 cups dried navy beans (we've actually used black-eyed peas for this recipe with great results)
2 teaspoons
4 cloves garlic, chopped
1 medium onion, chopped
2 tablespoons tomato paste
1 teaspoon dried ground chipotle pepper
1/2 cup dark fall honey
1 1/2 teaspoon salt
ground black pepper to taste

Rinse and pick through beans to be sure there aren't any stones. Place in a bowl and cover with cold water three inches above beans. Place in fridge and soak over night. (If you're short on time, you can place beans in a pot, add water to cover three inches. Bring just to a boil--just until the small bubbles appear around the edges of the pot. Turn off heat and cover for 1 hour. You'll be ready to continue with the recipe.)

Preheat oven to 325 degrees. Heat olive oil in a large, oven-proof pan (like a Dutch oven) and saute onion and garlic until soften. Drain beans, rinse well, and add to pan. Stir in 4 cups water, chipoltle pepper, tomato paste, honey and salt and stir well. Cover pot and place in oven. Cook for 3 to 4 hours, checking about once an hour to stir and see if the beans need more water. Add more water as needed. Serve hot or at room temp. Beans should be very soft and the sauce quite thick.

Another vegetarian addition: Add a few pats of butter when you remove from the oven to make the beans even more...mmmm!

Omnivorian addition: You can fry 4 or 5 strips of bacon (cut in 1/2 inch pieces) until crispy. Remove from pan, drain on paper towels and reserve. Saute the onion and garlic in the bacon fat. Add the fried bacon when you add the beans. Makes about 8 to 10 servings

HONEYED COLESLAW
Very simple--but deliciously tangy. You can also use sour cream instead of the Greek yogurt (that is if your calorie budget can bear it.)
4 cups finely shredded cabbage
1 cup Greek yogurt
1/4 cup cider vinegar
1/4 cup honey
1 teaspoon salt
2 teaspoons celery seeds
Combine well and chill. You can add some shredded carrots for color.
Makes 8 servings

GRILLED SKIRT STEAK WITH HONEY MARINADE
We sent this recipe out last year to the folks who subscribe to our email newsletter list recommending this marinade for the delicious skirt steaks the McElhaney Family Farm sells at the St. James Farmers' Market (and elsewhere). One reader wrote that McElhaney steaks are so good, nothing should be added to them! So, if you want to "gild the lily," try this recipe.

1/4 cup soy sauce
1/3 cup summer (or fall) honey
2 tablespoons balsamic vinegar
2 tablespoons freshly grated ginger
1/2 cup canola oil
2 pounds skirt steak

Combine everything except the steak in a jar with a good-fitting lid and shake to mix well. Add the steaks to a zip-lock bag along with the marinade and refrigerate over-night (but not longer). Prepare grill for cooking on medium-high heat. Remove steaks from the bag and discard marinade. Grill for 6 to 8 minutes on each side (slightly less for very thin steaks). Let rest 5 minutes (crucial step!). Slice thinly against the grain and serve slices with freshly grated horseradish or horseradish sauce. This recipe serves 4, but if used for sandwiches it will serve 8.

Looking for dessert? Check out our honey rhubarb pie recipe previously posted!


Friday, March 25, 2011

Lentil, Beet & Honey Salad

Two-for-one recipe day here at SteffesWood Apiary!  Robert has been busy cleaning up the garden this spring and planting peas, pak-choi and beets. The beets made me hungry for this salad, which is one of the best salads in the world--bar none!  It has lots of fabulous umami--a rich savoriness that makes this salad a meal on its own (especially if you're a beet fan).  It's adapted from Martha Stewart Living magazine

1 lb fresh beets, trimmed
1/2 cup water
1 3/4 teaspoons coarse salt, divided
olive oil
3/4 cup dried lentils (French green lentils are lovely, but plain brown ones also work--they may not need to cook as long, though)
1 1-inch knob of fresh ginger, sliced in 1/4 inch slices
3/4 teaspoon coarse salt, divided
1/2 cup red onions, minced
3 tablespoons olive oil
2 tablespoons raspberry vinegar (or other flavored vinegar--truth be told, cider vinegar would be fine!)
2 tablespoons honey
1 teaspoon ground coriander
1 teaspoon ground ginger (or 1/2 teaspoon grated fresh ginger)
1/2 cup chopped fresh mint
2 tablespoons chopped cilantro
salt and pepper to taste
Lettuce (for serving--optional)

Preheat oven to 375 degrees.  Place beets in dish with 1/2 cup water and sprinkle with 1 teaspoon coarse salt.  Cover with aluminum foil.  Bake until beets are tender, about 50 minutes.  When cool enough to handle, peel beets and toss with a little olive oil.  Chop beets into 1/2 inch pieces. (See note at the end of the recipe for an alternative way to prepare the beets.)

While beets are baking, place lentils and ginger slices in a sauce pan and cover with 1 inch of water.  Bring to a boil and simmer until tender, about 20 minutes.  Drain and discard ginger.  Stir in 1/2 teaspoon coarse salt.  In a small bowl, combine 1/4 teaspoon coarse salt with ginger, onion, vinegar and honey.  Steep for 15 minutes.  Stir in oil and coriander.  Pour onto warm lentils and toss to coat.  Stir in mint and cilantro.  Taste and season with salt and pepper.  Place beets on top of lentils. Serve on a bed of lettuce, if you'd like.

NOTE: A few years ago on a blistering mid-July day, Burgh Bees and Slow Food offered honey-based recipes at the Farmers@Firehouse Market in the Strip District and served this salad.  The Slow Food cook who prepared the salad couldn't bear to turn on her oven, so she grated the raw beets and put them in the salad--it was delicious.  Just sayin'!

Sunday, March 20, 2011

Honey Vegetable Stir Fry

We tried this last night with our fave-rave beekeeping bud, Steve Repasky, who gave it a thumbs up.  Steve favors meat dishes, so that's quite an endorsement!
Serves 4 to 6

canola oil to coat bottom of frying pan or wok
1/2 large Spanish onion, cut in 1/4 inch rings
3-4 garlic cloves, minced
toasted sesame oil
2 cups broccoli (stems peeled), cut in 1 inch pieces
1 red pepper, cut in 1 inch pieces
1 carrot, cut on the diagonal about 1/4 inch thick
1/4 small head of red cabbage, cut in 1 inch pieces
1/4 cup honey (we used fall honey)
1/4 cup soy sauce
1/4 cup chicken stock (you could use vegetable stock or even water)
1 teaspoon corn starch
1/2-1 teaspoon hot pepper flakes (or 1 teaspoon hot pepper sauce)
Cooked rice (for serving)

Heat canola oil in the pan over high heat.  Add onions and stir until they begin to separate.  Add garlic and toss to coat, cooking for a minute or so.  Add about 1 teaspoon sesame oil.   Add remaining vegetables and stir fry until they brighten in color and soften a bit.  Turn heat to medium. While veggies are cooking, in a bowl, add soy sauce to honey and stir to combine well.  In another bowl, add broth to corn starch and stir well to dissolve.  Add honey soy sauce mixture to veggies and toss to fully incorporate.  Add hot pepper flakes and toss. Add broth and corn starch mixture, stirring until thickened. Add a drizzle of sesame oil.  Taste and adjust seasonings.  You may want to add some more broth or soy sauce or even a little grated fresh ginger. Serve over cooked rice.