Saturday, March 26, 2016

Avocado and Citrus Salad

Late winter is a great time for citrus fruits.  Though California avocados aren't in season, because of the Mexican avocado crops, it's usually pretty easy to find good avocados.  The orange and red grapefruit in this salad provide just enough acidity to keep the avocado from turning brown too quickly, but this is still a salad that you want to eat as soon as you make it.  It's be great on its own, but was nice on a bed of baby spinach.  This made enough for two generous dinner servings.  If this is part of a larger meal, it would serve four and is easily doubled.  It'd make a refreshing salad for Easter!

Avocado and Citrus Salad
1 navel orange "supremed" (see directions below)
1 red grapefruit, also supremed
juice from supreming the fruit
1 tablespoon honey
1-2 tablespoons extra virgin olive oil
salt and pepper to taste
1 thin slice of red onion, chopped
1 avocado
2 cups baby spinach, washed and dried

Supreming citrus fruit:  Slice the ends off of the fruit and stand it on one cut end.  Slice the skin off the fruit, taking care to cut all of the bitter pith off but leave as much of the fruit as you can.  Hold the peeled fruit in one hand and, over a small bowl or measuring to catch the juices, slice on either side of each segment to free the fruit.  Place the segments on a cutting board.  When all of the segments have been removed, squeeze the remaining membranes over the small bowl to extract as much juice as you can for the dressing.  Cut the segments into about 1-inch pieces and place in a salad bowl.   Stir the honey into the juice, blending well.  With a whisk, slowly add the olive oil to emulsify. Whisk in a pinch of salt and pepper and set aside.  Cut the avocado in half length-wise and open. Remove the pitt and peel each side.  Cut into about 1-inch chunks. Add the avocado and diced onion to the citrus fruit and toss. Pour the dressing on top and toss again.  Taste and add salt and pepper if needed and/or some more olive oil.  Place one cup of spinach on a salad plate or bowl and top with half of the fruit/avocado.  Enjoy!

Saturday, March 19, 2016

Mom's Peanut Butter Honey Oat Treats

I've been bugging my mom to come up with recipes for this blog and these delightful treats are her latest invention.  We had them for "bezzert" at our regular Monday dinner get together.  "Bezzert" is the linguistic invention of my great nephew Sam--an ardent dessert aficionado--who began inquiring about the after dinner sweet options when he was but a wee lad. He's big enough now to pronounce "dessert," but "bezzert" remains the preferred word in our family.  It makes us smile every time we say it. Mom's Peanut Butter Honey Oat Treats are both chewy and crunchy--and couldn't be simpler!  They're a regular feature of Wood Family bezzerts! Thanks, Momma!

Mom's Peanut Butter Honey Oat Treats
1/2 cup crunchy peanut butter
1/2 cup honey
3 cups oat cereal (e.g. Cheerios)

Line an 8x8 pan with wax or parchment paper. Place peanut butter and honey in a large mixing bowl and melt in the microwave--about 30 seconds  Stir in the oat cereal, completely coating the cereal with the peanut butter/honey mixture.  Press into the pan and place in refrigerator until hardened.  Cut into squares.  An easy and good-for-you snack (or bezzert!). Makes about 16.
 

Saturday, March 12, 2016

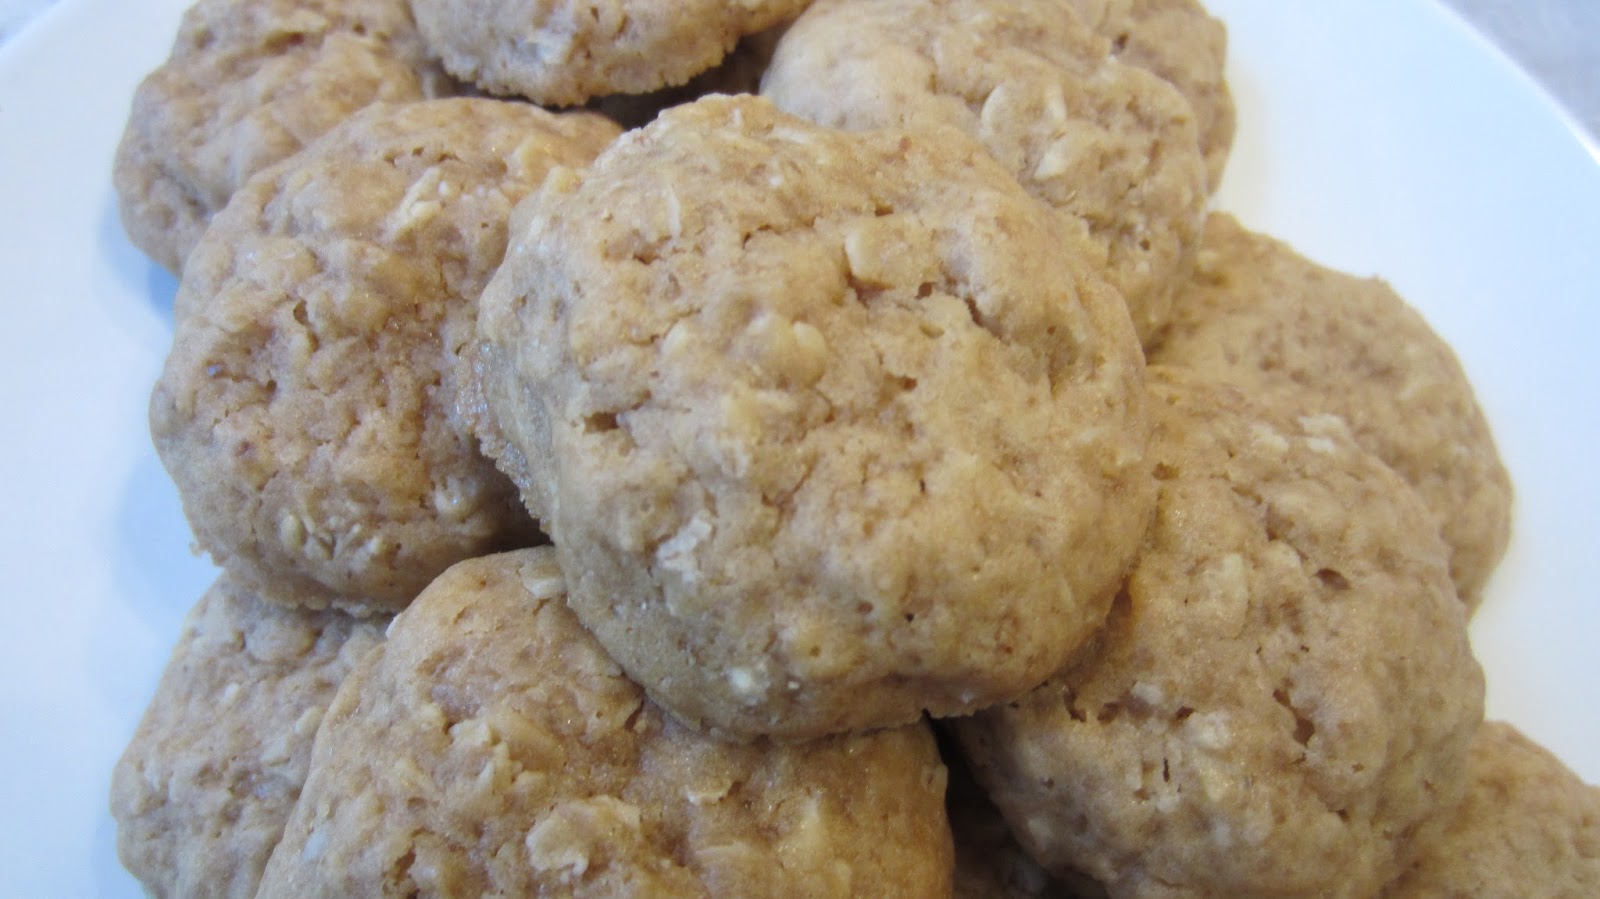
Chewy Honey Oatmeal Cookies


I made this for a little party in one of my classes.  The students have been working hard on a service-learning project and we celebrated completing part of it with a pizza party--and some cookies!  These made quite a few (about 50) because they're small.  Another interesting element of the recipe is that the dough sits for awhile so that the oats can soften. If you try to make them right after you mix them, they'll be a bit soupy and hard to form.  I found the recipe on the Food52 website--a cooking website I should check out more often than I do!

Chewy Honey Oatmeal Cookies
1 1/2 cups all purpose flour
1 1/2 cups oatmeal (the original recipe calls for quick-cooking; I used old fashioned)
1/2 teaspoon baking powder
1/2 teaspoon salt
3/4 cup demerara sugar (could use turbinado or brown sugar)
1/3 cup honey
12 tablespoons butter, melted and cooled
1 egg
1 egg yolk
1/2 teaspoon vanilla extract
1/2 teaspoon almond extract (a lovely addition!)

Whisk the flour, oatmeal, baking powder, and salt together in a small bowl.  In a larger bowl, whisk together the sugar, honey, butter, egg, egg yolk and extracts until smooth.  Stir the dry ingredients into the wet ingredients and mix until well combined.  Cover the bowl with plastic wrap and let sit for 30 minutes. (I let them sit for an hour because I used old fashioned oats.)

Preheat the oven to 325 degrees. Using a teaspoon, scoop and roll the dough into cookies about the size of a walnut.  Place on a parchment-lined cookie sheet and bake for about 12 minutes, until nicely browned at the edges.


Saturday, March 5, 2016

Montreal Bagels

This is another recipe from the Cooking at New York Times website, though you might also want to check out other recipes, like this one from The Splendid Table.  It's a great recipe for beekeepers who have lots of extra honey on hand.  It uses 1/2 cup of honey in the dough and then another 1/3 cup of honey in the water bath the bagels are poached in before baked.  Unlike New York bagels, Montreal bagels are supposed to be smaller, sweeter and have a larger center hole.  You can see from my photos that I didn't quite achieve that effect.  These are delicious, though--and because of the honey in the dough, they toast very nicely!  If you get an early start, they can even be ready for a late Sunday brunch.

Montreal Bagels
1 1/2 cups water, room temperature
2 packages quick-rising yeast
1 teaspoon sugar
2 1/2 teaspoons salt
1 whole egg
1 egg yolk
1/4 cup oil
1/2 cup honey
5 cups bread flour (may need a bit more)
3 quarts water for boiling
1/3 cup honey
sesame or poppy seeds for sprinkling on top 

You can mix this dough by hand, but a stand mixer with a dough hook makes go a lot faster!  In a large bowl, stir together the water, yeast, sugar and salt. Stir in the egg, egg yolk, oil and honey and mix until well combined. Add the 5 cups of flour and mix until too stiff to mix by hand. Turn onto a floured board and knead until the dough is soft and supple. (If using an electric mixer, switch to the dough hook for this.) Add as little extra flour as you can while kneading, just to keep the dough from sticking. Place the dough in a well-oiled bowl and cover with plastic wrap. (At this point, you can refrigerate the dough if you'd like and make the bagels the next day.  If you do, bring the dough to room temperature before proceeding.) 

If proceeding with the recipe, then let the dough rest for 20 minutes.  Gently punch the dough down and divide into 18 even pieces.  Place the three quarts of water and 1/3 cup of honey into a large pot and bring to a boil.  Turn down to simmer while you get the bagels ready.

Take one dough piece, roll into a long rope (about 8-10 inches long).  Join the ends, pinching and rolling to firmly adhere them.  If they're not firmly adhered to each other, they can come apart in the water bath.  Place the formed bagels on a towel-lined baking sheet and let rest for 15 minutes.  

Preheat the oven to 450 degrees.  Bring the water bath back to a boil.  Gently lower three bagels at a time into the water bath.  When they rise to the surface, turn them and let them poach for another minute.  Place the boiled bagels on a baking sheet (remove the towel!) and sprinkle with poppy seeds or sesame seeds. Continue boiling and seeding and placing on the baking sheet. 

Bake for about 20-25 minutes, until they are nicely browned.  You can freeze thoroughly cooled bagels, wrapped well, for future use. 


Saturday, February 27, 2016

Asian/Italian Fusion Noodle Bowl-Dinner for One!


Robert has been flying up a storm lately and so I've been on my own for dinner.  This crazy--but delicious!--dish was tossed together from what I had in the vegetable bin and pantry.  I wasn't expecting much from it, but was absolutely delighted by the flavors.  Even the rigatoni, which I decided to use instead of some rice noodles, long pasta, or rice, made a nice chewy contrast to the broccoli and roasted mushrooms, if I do say so myself.  Maybe my low expectations of the dish helped me to enjoy it more than it deserves.  I'll make this again--and maybe next time when Robert is around!

Asian/Italian Fusion Noodle Bowl Dinner for One
4 oz. white mushrooms (about 6 medium), stemmed, cleaned and cut in half
2 large cloves of garlic (not peeled)
olive oil
1 cup (or so) of broccoli florets
1/2 cup dried cut pasta (I used rigatoni--penne or fusilli or orzo would do--as would any long pasta)
2 teaspoons sesame oil
2 teaspoons soy sauce
2 teaspoons honey
1/2 teaspoon sriracha sauce (or red pepper flakes)--optional

Preheat the oven to 400 degrees.  Line a cookie sheet with aluminum foil.  In a small bowl, toss the cut mushrooms and unpeeled garlic with about a tablespoon of olive oil--making sure that all of the mushrooms are covered with oil.  Drizzle a bit of olive oil on the cookie sheet and place the mushrooms cut side down, and add the garlic.  Roast for about 10 minutes, then turn the mushrooms and garlic and roast for about 10 minutes more--until the mushrooms are nicely browned and the garlic is very soft.

While the mushrooms and garlic are roasting, bring a pot of salted water to boil and cook the pasta according to package directions.  About 4 minutes before the pasta is done, add the broccoli florets so that they blanch and become a nice, pretty green. Drain the pasta and broccoli.


When the mushrooms and garlic are done, as soon as you can handle the garlic squeeze the roasted cloves into a small bowl and mash.  Add the sesame oil, soy sauce, honey, and sriracha sauce and whisk to combine well.  Toss the roasted mushrooms, pasta, and broccoli with the sauce and enjoy your meal! 

Saturday, February 20, 2016

Soft Rye Pretzels with Sesame Seeds


This is another great recipe from Cooking with New York Times. The rye flour adds a nice flavor to these pretzels, but you could probably substitute whole wheat or use all white flour if you don't have any on hand.  Like any yeast bread recipe, this takes some advanced planning--about two hours all told.  We don't like salty pretzels, so I sprinkled pinch of kosher salt on top and used sesame seeds instead. I may have over done the sesame seeds, a bit--but these are really good.  Poppy seeds or, since this uses rye flour, a few caraway seeds would also be nice.  The chewy, dark crust of pretzels is made by poaching the risen and formed pretzel dough in a pot of boiling water with a hefty 1/2 cup of baking soda stirred into it.  The baking soda makes an alkaline bath that creates the browning (some recipes call for lye--no lie!). Up for a chemistry lesson?  Check out this explanation from The Salt at NPR!

Soft Rye Pretzels with Sesame Seeds
1 1/4-oz packet of yeast (I used rapid rise)
1 1/2 cups luke warm water
1 tablespoon honey
3 cups all-purpose flour
1 cup rye flour
2 teaspoons salt
1/2 cup baking soda
1-2 tablespoons sesame seeds
kosher salt for sprinkling on top 
Place the water in a large bowl and sprinkle the yeast on top.  Add the honey and stir until well combined.  Add 2 3/4ths cup all purpose flour, all of the rye flour and the salt.  With a wooden spoon, stir until all of the flour is incorporated.  Turn the dough out onto a lightly floured surface and knead for about 10-15 minutes, sprinkling the dough lightly with the remaining 1/4 cup of flour as needed.  If the dough is really sticky, oil your hands a bit to make it easier to knead.  Oil or butter a large bowl, place the kneaded dough in, oil the top and cover with plastic or a towel and set aside to rise for about 90 minutes. (It won't double in bulk.) 
 

Line two cookie sheets with parchment paper (or aluminum foil) and lightly oil or butter them. Divide the risen dough into 12 roughly equal pieces. Working with one piece at a time, roll into a long rope--about 16 inches long.  To make the pretzel form, create a loop by folding the rope in half, leaving a wide loop at the top.  Twist the ends twice and then fold them up to meet the center of the loop. Spread the ends a bit and firmly press them into the dough.  As you make the pretzels, set them on the prepared cookie sheets. Let the formed pretzels rest, covered, for about 20 minutes.

While the pretzels are resting, preheat the oven to 450 degrees and arrange the oven racks to be in the center and top of the oven. Place a large pot filled with 10 cups of water on the stove and bring to a boil.  Carefully sprinkle the baking soda into the boiling water--it will bubble up a lot, so take care with this!  Working with about three pretzels at a time, carefully drop them knot side down into the boiling water and poach for 30 seconds.  Turn the pretzels and poach on the other side for another 30 seconds.  Place them on a kitchen cloth to drain briefly, then put them on the prepared cookie sheet and sprinkle with salt and sesame seeds.  Bake for about 15-16 minutes, until they're well-browned, turning the cookies once for even baking.  Serve with spicy mustard--some honey mustard would be nice!

This recipe makes 12 pretzels.  I froze six of the formed pretzels, fearing we'd eat all 12 in a day or two if I didn't.  I can't vouch for how well the dough freezes, though.  My plan will be to thaw the dough on the counter and proceed with the recipe.  I'll try to remember to report back how well this works!


Saturday, February 13, 2016

Scotch-Peanut Chocolate Truffles for Valentine's Day!

My father is a Scotch connoisseur.  Lucky for him, Robert occasionally makes a trip to Scotland, and when he can, brings back a drop or two of that country's finest drink.  Dad's favorite distiller at the moment is Deanston, which makes (according to Dad) some wonderful single malt Scotches. When I saw this recipe for Scotch Peanut Chocolate Truffles by Florence Fabricant on the NY Times Cooking website and noted that they used a bit of honey, too, I knew I had to give them a try. We're not as taken with Scotch as Dad is, so I had to borrow a few tablespoons from him to make these chocolates. (Don't worry, Robert! I didn't use the good stuff!)  If you don't have Scotch, a liqueur or other distilled drink would probably work--Grand Marnier or amaretto or Chambord? Bourbon?  You might also swap out the peanuts for another kind of nut like almonds or cashews.  A slight and lovely hint of the Scotch does come through and marries well with the peanuts in the chocolate. I used milk chocolate to coat the truffles instead of the bittersweet chocolate called for in the recipe. This made what seems like a ton of truffles--about 48--that I'll be sharing with Dad and Mom. Next time I make them,  I'll likely cut the recipe in half, though.  If you have some grown up valentines, these unique truffles would be a lovely, homemade gift!

Scotch Peanut Chocolate Truffles
8 ounces good quality bittersweet chocolate, chopped into small pieces
2/3 cup heavy cream
2 teaspoons honey
3 tablespoons Scotch
6 tablespoons salted peanuts, roughly chopped
1 teaspoon vanilla extract
1 lb 4 ounces good quality milk chocolate, chopped into small pieces

Place the bittersweet chocolate into a heat-proof bowl.  Heat the heavy cream to a simmer and pour over the chocolate, stirring to melt.  If you need to, briefly place the bowl over a post of simmering water to melt all of the chocolate.  Stir in the honey, Scotch, nuts and vanilla.  Chill until firm.

Using a scant teaspoon, roll the chocolate into small balls about an inch in diameter.  Place them on a lined cookie sheet and then freeze for about 30 minutes, or until nice and firm.

Melt 16 ounces of the  milk chocolate (either in a pan over very low heat or in the microwave for a minute or so--being careful not to burn it).   Add the remaining 4 ounces of milk chocolate and stir to melt.  Dip the truffles into the chocolate to cover completely and place on a lined sheet. (The directions in the original recipe called for spearing the truffles with a fork and dipping them into the chocolate to coat.  That didn't seem to work for me. I plopped a few a time in the bowl, tossed them around, and then used a fork to scoop them out.)  In about 15 minutes, they'll be ready to eat.  Store in the refrigerator.